Thursday, June 30, 2016

Bestie Painting Boy

Hello Besties! Today I want to share with you my DT inspiration project for the Color It, Create It, Show It Off Challenge Blog. For my project I created this Adorable Bestie Painting Boy Card.


To create my card I used a My Bestie Digital Stamp by Sherri Baldy Image 593 that you can find here:

You can also find our current Challenge here:

To make my card I used Soho Acrylic paints to paint my card base. I just did a quick abstract under painting and then set it aside to dry. Next I printed out the my Bestie digital stamp onto 110 lb. card stock and colored the image in with Copics. After that I inked the edges of the white card stock with Distress Ink in Vintage Photo to add some extra dimension. Next I cut an orange mat to frame the digital stamp. To finish I attached all of the elements to my card base, and then added some buttons and swirl paperclips for some extra embellishment. 

I hope that you enjoy my card and are inspired to enter your own creations into our challenge for your chance to win some Amazing Bestie prizes. 


Sunday, June 19, 2016

Father's Day Fishing Card

Hello again Everyone! Today I want to share with you a Father's Day Fishing Card that I made.


To make my card I used a Super Cute stamp from Vilda Stamps called Fishing Guy V836 that you can find here: http://shop.textalk.se/en/article.php?id=16232&art=35746507


To make my card first I stamped the fishing boy and can of worms images onto 110 lb. plain white card stock. I then colored all of the stamped images in with Copics, and then used a white paint pen to add the highlights. After I was finished coloring the images, I then fussy cut them out. Next I cut my mats with the Crazy Stitched Frame Dies from CDD. After that I attached the mats and stamped images to my card base, To finish I added a die cut fish, gauze, flowers, and rhinestones for some extra embellishment. I just Love this cute little fishing guy stamp, and thought he would make the perfect Father's Day Card. Don't miss out on adding this cutie to your collection. Thank you for stopping by and have an Amazing Day! 

Saturday, June 18, 2016

Flower Girl Card

Hello Everyone! Today I want to share with you a Flower Girl Card that I made.


To create my card I used an Adorable stamp from Vilda Stamps called Girl with Flowers V836 that you can find here: http://shop.textalk.se/en/article.php?id=16232&art=35746507.

To make my card first I stamped the Flower Girl image onto 110 lb. white card stock. I then colored the image in with Copics, and then used a white paint pen to add the highlights. Next I cut the mats using the Crazy Stitched Frame Dies and Fancy Frame Dies from CDD. After I cut the mats, I then inked the edges with Distress Ink in Mermaid Lagoon. Next I used a Spellbinders Flower Die and some flowers cut from my Explore in plain white card stock for my paper flowers. To make these I used Distress Ink in Picked Raspberries and Chipped Sapphire to color all of the petals. I then glued the petal layers together and added a gold die cut to each flower center. To finish I attached all of the card layers to my card base, and then added the flowers with foam tape for some extra depth and dimension. I hope that you enjoy my card and are inspired to try out your own projects with these super Adorable stamps. Thank you for stopping by!

Sunday, June 12, 2016

CDD Aloha Card

Hello Everyone! Today I want to share with you an Aloha card that I made with the newly released Island Paradise stamps that I designed Exclusively for Craftin Desert Diva's.


For my card I used the following CDD Goodies:

New Island Paradise Stamps

New Crazy Stitched Frame Dies

Outdoor Landscape Dies
Fancy Frame Dies
Cotton Candy Sequins

To create my card first I cut the bottom frame with the new Crazy Stitched Frame Dies from gold foiled watercolor paper. I then cut the top mat twice with the Fancy Frame Dies from plain white 110 lb. card stock. Next I cut the extra Fancy Frame mat with the Outdoor Landscape Dies to create the sand and waves. I did this so that they would line up perfectly when layered over the bottom Fancy Frames Mat. Next I used Distress Ink in Mustard Seed, Mermaid Lagoon, and Peacock Feathers to color the background, water, and sand. I then used Distress Ink in Picked Raspberries and Abandoned Coral to color the foiled watercolor paper frame.

Next I stamped all of the images onto their svg outlines and then colored them in with Copics. I then used a white paint pen to add my highlights. To finish I attached all of the layers to my card base and then added some of the Cotton Candy Sequins for some extra sparkle and embellishment.

I hope that you were inspired by my card to try your own creations with this super Fun stamp set. Thank you for stopping by!

Friday, June 10, 2016

CDD June Release Blog Hop Day 1


Welcome to day 1 of the CDD June Product Release Blog Hop. 
All stamps are in the CDD Shop and now available for purchase HERE.


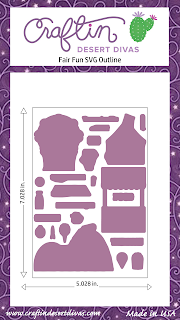
We also offer SVG stamp outlines for .99 they work perfectly with your cutting machine. You must have a program that opens these files. This is a great alternative to coordinating dies and much less expensive. 


New $1.00 sequins....


I am So Excited to share with you a project that I made using one of the new stamp sets that I designed Exclusively for CDD. I really hope that you love it as much as I did creating it for you! There are so many Amazing possibilities of projects that can be made from this set!
Here's what I've created for you...


For my card I used the following CDD Goodies: New Fair Fun StampsNew Crazy Stitched Frame DiesFlag Banner DiesFancy Frame Dies, and Cotton Candy Sequins.

To create my card first I cut the bottom card frame from patterned card stock with the New Crazy Stitched Frame Dies. I then used the Fancy Frame Dies to cut my top mat from plain white card stock. I then used Distress Ink in Tumbled Glass, Mustard Seed, and Picked Raspberry to create my background. 

Next I stamped the new Fair Fun stamps onto their SVG stamp outlines. I then colored all of these adorable images in with Copics and then used a white paint pen to add the highlights. After that I cut out the banner with the Flag Banner Dies. I then stamped the sentiment using a stamp from the Fair Fun Stamps. 

To finish I attached everything to my card base with glue dots and foam tape for some added dimension. I then added some of the Cotton Candy Sequins for some added sparkle and to also accent the stitching on the Crazy Stitch Frame Dies. 


Here are the specials for this release:

**New sequins mixes will be on SALE for $1.00.

**FREE SHIPPING with minimum on orders placed.

Shipping minimum orders:

$10 USA use Code: 10SHIP

$15 International use Code: 15SHIP
 

Enjoy this special for in stock items only 6/10 thru 6/15 at 10pm MST
All Stamps and Dies are made in the USA.


Each day from 6/10 thru 6/15 one comment left on the projects 

will be chosen from random.com to receive a $15.00 CDD shop 

credit. So be sure to join us for our 2 day blog hop and then hop 

on over to the CDD Facebook page to join us for our Release 

Inspiration Hop. The CDD DT will feature more projects 

showcasing the new June release.


I am your last stop for today. We thank you for joining us and invite you to hop along with us again tomorrow for some more Amazing projects and inspiration!

If you came across my blog and would like to start at the beginning of the Blog Hop you can find the first stop here: 

CDD- http://www.craftindesertdivasblog.com/

Wednesday, June 1, 2016

Sunflower Bestie Card

Hello Besties! Today I want to share with you my Design Team project for the My Besties International Challenge Blog. For my project I created this Sunflower Bestie Card.


To create my card I used a My Bestie Digital Stamp by Sherri Baldy called Image 957 that you can find here:  http://www.mybestiesshop.com/store/p3096/My_Besties_img957_Sherri_Baldy_digi_stamp_.html.

You can also find the My Besties International Challenge Blog here:  http://bestieschallenge.blogspot.com/2016/06/welcome-to-my-besties-international.html

To make my card first I printed the My Bestie Digital Stamp onto 110 lb. plain white card stock. Next I colored the image in with Copics. After I was done coloring the image, I then fussy cut it out and set it aside. Next I cut the bottom frames for my card with the Gina Marie X-Stitched Frame Dies. I then attached all of the layers to my card base, and then used foam tape to add dimension to the digital stamp on top. To finish I added rhinestones and flowers for some extra sparkle and embellishment. 

I hope that you are inspired by my card, and join in our challenge with your own Bestie creations for your chance to win some fantastic Bestie prizes. Thank you for stopping by and have a wonderful day!